Whenever I tell people I'm canning stuff, I get told that they are scared of pressure cookers. I promise that the days of exploding canners are in the distant past. If the vents get blocked, modern canners have blow-out valves that will release the pressure, you will not have a bomb going off in your kitchen. Many people are scared to death of canning because they heard a story. For more information and to ease your troubled mind, read this.
Storing food for later use mainly involves stopping spoilage by killing nasty stuff already in your food, keeping micro-organisms away from food with an air-tight seal and/or adding ingredients that inhibit the growth of any nasty stuff that might have made it through your killing efforts. Fruits, jams and jellies can be preserved with a combination of copious amounts of sugar; which keeps stuff from growing in there, heat; to kill bad stuff, and an airtight seal; which can be accomplished without the use of a pressure canner through a process called a "water bath". The process is very basic even though it sounds a little scary. Basically, you make something yummy, like, oh, I don't know...maybe SPICED PEACH JAM or even better, BLACKBERRY PEACH JAM and you make it, following the directions. You can't make jam recipe's more healthy by reducing the amount of sugar!!! I'm all about breaking rules, and I firmly believe that recipes are nothing more than a good place to start, but you must use tried and true recipes for canning. You can vary the kind and amounts of spices in any given recipe, but you must keep the ratio of fruit to sugar the same. In fact, I'm pretty sure when I make Spiced Peach Jam, I use the Blackberry Peach recipe spices instead of what you see there. Anyhow. Today's focus isn't going to be canning fruits and jellies. Lets talk MEAT!
There are a few slight differences in canning with a pressure canner vs. using a water bath, but for the sake of today's discussion, we'll assume you don't know squat about either one. I've canned chicken, ground beef, chicken soup and chili in the past week. Some of the chicken I did was raw pack...as the name implies, it was raw when I packed it in the jars. You can do this because it will cook during the pressure canning step. The ground beef, soups and chili were all cooked. I discovered during my research for this project that you shouldn't can soup with dairy or thickener's in it. They also recommend you not add noodles, barley or rice before canning either.
So here's how to can your own meats and soups:
You need pint and quart sized mason jars. Because you will be canning under pressure, it's not a good idea to use old garage sale jars. Buy your own new from somewhere like Wal-mart or even most grocery stores. If you do get used ones, make sure they are from someone you trust and they aren't ancient. You will be re-using the jars, but never, never try to re-use jars from a commercial packing operation...like a mayonnaise jar; and some old commercial jars look a whole lot like home canning jars. If your mom bought jars and used them for two or three years, then you're probably OK, but we want to stay away from garage sale and DI finds for this project...K?
Jar Prep: No need to sterilize your jars! Which is super nice. Just wash with warm soapy water and dry. I also dropped the lids in some hot water while I prepped the other stuff, just to soften up the seals.
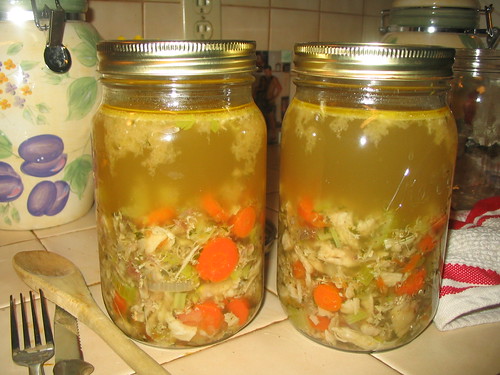
Chicken Soup: I made a nice stock, added some celery, onions, carrot and removed the bones from the chicken I used to make the stock. I then ladled it into quart jars, filling each jar about half full of goodies and the rest of the way with stock. I left about an inch of "head space" at the top of the jars. Head space is the amount of air you leave when filling your jars to allow for expansion during heating. If you don't leave enough, it may allow food to leak out or, I guess, theoretically, it could bust your jars.
Raw Pack Chicken Breast: I found some chicken breast tenders on sale, some I diced, some I left whole. I rinsed the chicken well and packed it into pint jars leaving about 1/2 inch of "head space" at the top. I did my best to squish out the air spaces down in the meat, but I'm pretty sure that's not totally necessary. Last, I sprinkled about a half teaspoon of salt on the chicken. No need to add liquid when raw packing.
Cooked Chicken Thighs: I baked some thighs I found on sale, removed the skin, de-boned and rough chopped. Then I packed it into pint jars and filled each with water and chicken juice from baking, leaving one inch head space. Sprinkled 1/2 tsp salt on top of each.
Ground Beef: This I browned, drained, rinsed and salted. I then packed it into a pint sized jar and added water, leaving one inch head space.
Chili: Made my friends make it. There were two varieties, one of which was from the recipe on the sidebar. We ate what didn't fit into the quart jars we used. It was super tasty!
Once I had the stuff in the jars, I put the warm lids on and put the screw bands on...you want them tight, but not too tight...somewhere between Hercules and Pansy Butt should be just about right.
When you can jelly and jam, you ladle the hot jam into hot, sterilized jars. This process doesn't require the jars or the contents to be hot. I guess you would want to use common sense...like not taking frozen or super cold jars full of stuff and plunking them into boiling water...but you don't have to have everything hot for this process.
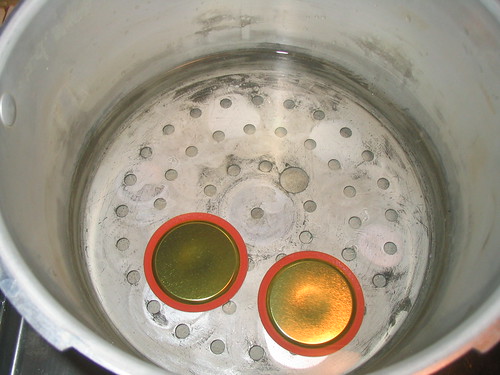
Once the jars are packed and the lids screwed down, all that's left is the actual canning...which is what intimidates people but I promise, it's the easiest part. You fill your canner with a couple inches of water and put the rack down in there. The rack is going to keep your jars from sitting on the bottom of the pan and therefore, the direct heat of the element. The water will create steam and pressure which will super heat your food and jars and kill any bad stuff lurking in your food. The cooling is what will create a vacuum inside your jars and seal the lids on for long term storage.
It is important to note that you can't can meat or soups with a pressure COOKER...it must be a pressure CANNER. The best use a metal to metal seal and wing nuts that hold the lid on tight. But there are several other varieties out there that have rubber seals that work just dandy. The main difference between a pressure cooker and a pressure canner is that a canner is capable of building more pressure and there is some form of telling how much pressure is built. The pressure is measured with either a weight or an actual gauge. If your canner has a gauge, you just have to read the dial to tell how much pressure is inside, if there is no gauge, you have to listen for steam rocking the weight, so I shot some video to show you what it should sound like.
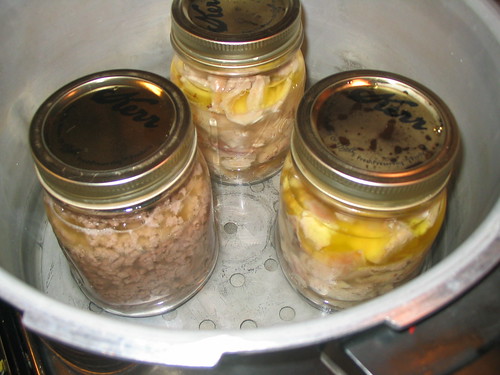
So. You've filled your jars, you've screwed on your lids, you've put some water and your rack down in your canner...what's left? Well, you need to put your jars into your canner. Only can one size of jar at a time. You will process pints for 75 minutes and quarts for a whole 90 minutes, so it just wouldn't do to have them all in there at the same time. So put your jars in like so...
and lock the lid down on your canner. Now, turn your heating element on high. Pretty soon, you will see steam spouting out the top of your canner like this:
Photo Sharing - Video Sharing - Photo Printing - Photo Books
Steam needs to escape from the canner in this manner for ten minutes. Once the ten minutes is up, you place the weight on the spout. We will be canning at 10 pounds but if you are over 1000 feet in altitude, you need to can at 15 pounds. So, if you have a canner with a gauge, just plunk the weight onto the canner, and once the canner builds ten (or 15) pounds of pressure, you will turn the heat down to keep it at 10 (or 15) pounds on the gauge for the entire length of your processing time: again, 75 minutes for pints, 90 minutes for quarts. DO NOT LEAVE YOUR CANNER UN-ATTENDED. Do not let the canner get under ten pounds of pressure, if you do, you have to get it back up to ten pounds and start timing over again. Better to have a bit too much pressure than too little. If your canner doesn't have a dial-type gauge, you will need to read on. You will still place your weight on there after the steam has escaped for ten minutes. Most canners of this type have a round weight that has 5, 10 and 15 imprinted on the weight and holes at each of these numbers. We are going to use 10 (or 15 if above 1000 feet in altitude) and put that baby on there. Then, it's going to start jiggling like this:
Photo Sharing - Video Sharing - Photo Printing - Photo Books
Which is good. Once it starts jiggling, you can start timing (75 minutes for pints, 90 for quarts!) and you are going to reduce the heat until it jiggles like this:
Photo Sharing - Video Sharing - Photo Printing - Photo Books
and you are going to listen for and maintain that jiggling pattern throughout your processing time. Once you have processed your cans for the prescribed amount of time, 75 minutes for pints and 90 minutes for quarts...in case you didn't notice before...you turn off the heat. Now you can go do whatever you want...it it safe to leave your canner at this point. You need to let your canner cool down and release pressure all by its self. Try not to cheat. DO NOT run cold water over your canner to force cooling. Don't lift the weight. The canner doesn't have to be stone cold before you open it, but the pressure has be all off before you take off the lid. If you are in a hurry, give it 30-45 minutes and take off the weight. If there's no hissing steam, you can probably take the lid off and remove your jars. You'll want to set your jars on a towel in a draft free place and remember, they are gonna be super hot if you didn't let the canner go all the way to cold before you take them out! A jar lifter is a handy piece of equipment in this case. I also cover my jars with another towel as they cool. You may hear the lids "plink" when they seal. You may not. You do need to check and make sure the lid of each jar has sucked down and is concave in appearance. Incidentally, you should also make sure each jar is still sealed before you consume the contents once you've stored them a while. Write the month and year on the lid before storing with your BFF, the Sharpie marker. And stand back and enjoy your domestic efforts! I know, the whole thing is easier than it sounds, but we won't tell anyone. For additional information or if my directions weren't clear enough, the CSU extension site has a nice page on canning.
